Showing posts with label scrapbook paper. Show all posts

Thursday, May 27, 2010

Tags from Recycled Cards

I found some cards and decided to re purpose them by making tags. To make the tags special I added a crochet border.
 To make these tags, you will need a pretty card cut in tag size: 3" by 4"  or 3-1/2" by 4-1/2".  You will also need an awl or a sharp needle to make the holes on the bottom edge of the tag.  To make the crochet border, I used a size C (2.5mm) crochet hook.
 Sport Weight yarn.  I used Patons Grace.
 Cut the card in tag shape.  To cover the back side of the tag I used scrap book paper. Use a glue stick to glue two pieces together.
Using the awl and graph paper as a guide puncture the bottom edge of the tag.  I worked on a mouse pad surface to protect my table. 
You may go over each hole to enlarge them  a bit so the needle will go through easier.
 Cut a piece of yarn at least 5 times the width of the tag.  Thread a wide eye needle (such as a Tapestry needle) and use the blanket stitch to create an edge.  This is the base and you will use it to make  the crochet stitches.
With the front of the tag facing you (this is the right side), insert the crochet hook and begin the crochet border.
Here are some more samples:  This mini tag came with a bag I bought at Target.  You may cover the tote bag words and add your own words....such as Hi....or What's Up?  Use your imagination.  Affix this mini tag to a card.
as I did in this example:
Christmas card turned into a tag.
Can you tell I like snowmen? I chose to hide the blanket stitch on the snowmen tags.  The blanket stitch and crochet border were done on a separate tag and covered with the snowman card pictures. Simply glue the two layers together.
More samples....
I will make a short video showing how to make the blanket stitch on the card stock soon.
I have written three patterns which are very simple to follow:

Crochet Border Tags


Jabberbug

Tuesday, April 27, 2010

Fun with Scrapbooking Paper and Magazines

I have found a use for all those magazines that have beautiful pictures such as Southern Living and Country Living.  Before you decide to recycle them...go through the pages and cut out pages with flowers, gardening pictures, text etc....I made two cards that were fun and easy to make.

This is card #1
Make the base card by folding a piece of card stock which measures 5-1/2" by 8-1/2". I used Kraft color card stock from Stampin' Up.  You will also need a button for the center of the paper flowers.

 
 For this card I wrote a message around the perimeter of the larger one using a fine tip permanent marker. "Wishing you a Happy Birthday...may all your dreams come  true. It's your day.


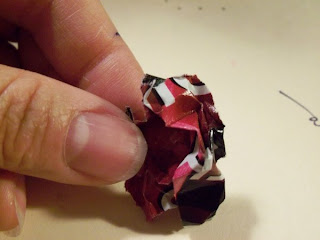
Cut out circles in three or four different diameters approximately (3-1/2, 2-1/2 and 1-1/2 inches)  If you don't have a circle cutter, you can just find circular objects around your house (glasses, jars, etc...) to trace the circles.  The measurements don't have to exact...just cut the circles in different increments.   The magazine paper is easy to tear so for I tore the circles after I  traced them.  Next crumple up all the circles.
Line up the circles and sew the button in the middle.  Insert the needle from the top and finish with a knot.

 Cut a larger image from the magazine to use as the background.  I used a punch to make scallops on the lower edge of the paper.
 
 Position the leaves to the right.  Place the circles on top of the leaves.  You are done.
 To make card # 2, I used scrapbooking paper to cut the circles and leaves.  This paper is much thicker so you will need to spray the paper (back and front) with water before crumpling.  Let air dry.  I used a button brad to secure the three layers of card stock.
 
 Supplies needed for this card.  I also used Stampin' Up Kraft card stock for the card cut in the same dimensions for the first card. If you don't have a punch to cut the scallop strip, you can use scissors that cut decorative edges or even tear one side of the strip in the same way you did the circles in card #1.
Happy Crafting 


Jabberbug