Wednesday, March 30, 2011

Misty Rain Walk

Misty Rain Walk
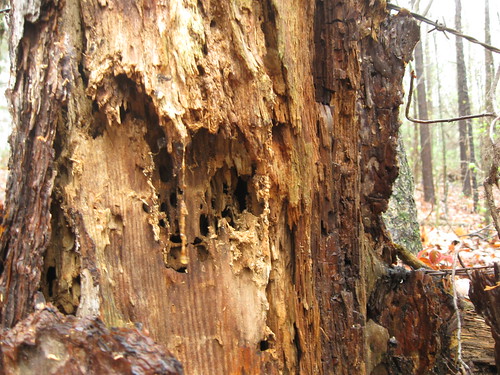
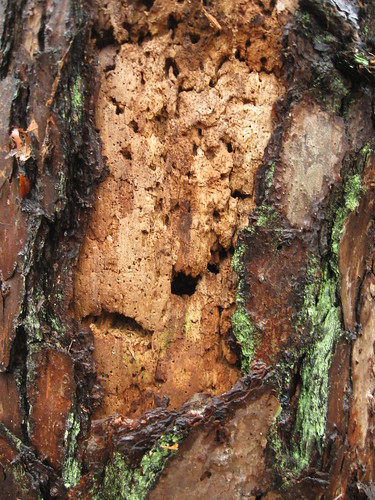
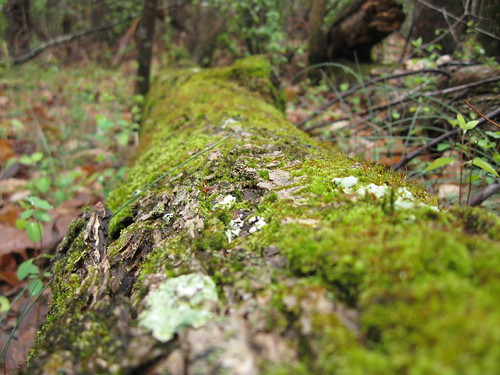
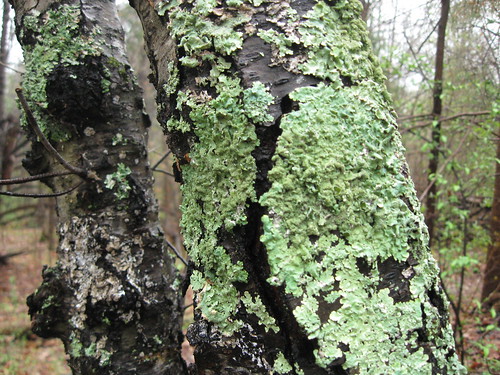
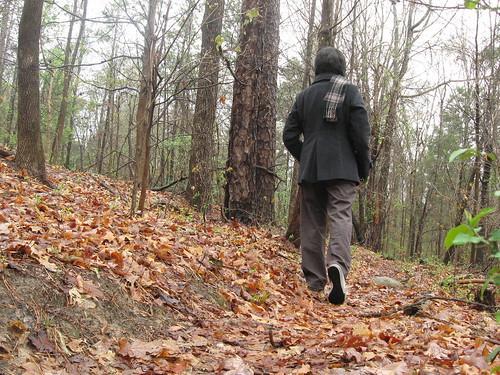
I find it very relaxing to take walks during my lunch or dinner hour.  The weather has turned cold again and even though it was misting a little bit I managed to get out of the Library building.  It's really invigorating to come close in contact with nature especially after 4 + hours of Library work.
Now that I take one picture a day as part of the Flickr Project 365 challenge I always have an excuse to take walks and find subjects to photograph.

Layers and Layers of Termite Damage

Old Pine Tree
 Old Pine Tree
Old Pine Tree
 This log is completely covered in moss.  So beautiful!
Log Covered with Moss
 This tree Lichen is as bright as it looks.  I love the beautiful shade of green.
Pretty Bright Green Lichen
This walk was particularly special today and it did wonders to refresh me.  I'm so glad I did take the walk even on this misty day.

Sunday, March 27, 2011

Spinach Lasagna


Love eating Lasagna but dread the boiling of the noodles.  You can skip this step by using No Boiling noodles which are now available in most Grocery stores.  I particularly like the Trader Joe's Italian No Boiling -Oven Ready noodles.  For this recipe you will use almost all the box.  I ended up with four layers of noodles.  You can actually have 5 layers of the lasagna noodles if you put less spinach and ricotta filling on each layer.


In a frying pan cook together in a small amount of oil (Canola, Vegetable, Olive or Grapeseed oil) 1 cup of onions and the chopped mushrooms.


For this recipe I used a large container of Part Kim Ricotta Cheese and two 10 oz packages of frozen chopped spinach.  Ragu sauce is not only economical but delicious and available in an array different flavors.  I used the Chunky sundried tomato and sweet basil and loved it.  You will need two of the 10 oz large jars.  Mix the drained spinach, 1 tablespoon dried basil or dried oregano,  the entire  container of
Ricotta cheese and 1/2 cup of parmesan cheese in a large bowl.

As you can see the noodles are layered uncooked.  You can prepare this Lasagna 24 hours ahead of time. Sweet!  My large baking dish had room for 6 noodle pieces overlapped.
Use a measuring cup to add the sauce.  You can actually add less than the cup of sauce per layer.  Just make sure to spread the amount of sauce evenly on each layer.
 You will be able to put a generous amount of the spinach filling on each layer.  Drop using a tablespoon and distribute.

Serve your lasagna with a tossed green salad and garlic bread.


The entire detailed recipe can be seen and downloaded here:

http://www.scribd.com/full/51659233?access_key=key-uxwpp1finx096vdodrc

Friday, March 18, 2011

Sprout my Chia Kitten


I have been having a lot of fun looking after my first Chia Pet. I even gave the Chia kitten I got for my birthday from my daughter and grand kids a name.  Meet Sprout.


The Chia kitten I got for my birthday came with a softie Chia Bear.  Here he is looking at the seeds which are soaking in water.  The instructions tell you to soak in 1/4 cup water 2 teaspoons of the Chia seeds.  In reality this is way too much.  You only need 1 teaspoon of chia seeds.  You have to soak the seeds for 1 hour.  Do not go over this amount of time like I did the first time.  If you do the seeds will be hard to adhere to the ceramic kitten.  As  the seeds soak they become gelatinous and this actually will help to spread the seeds on the surface.  Use a small spoon to pick up the seeds and spread all around the ridges.
If you leave  the seeds soaking for more than an hour, they turn really slimy and slippery.  As you  can see my first attempt was not successful.  I wasted a lot of seeds. Cliff has ordered me more Chia seeds.  You can buy them online from Amazon.

Keep you Chia Pet in a well lit space and fill the clay container daily with water.  There is a hole at the very top of the clay  container.  Always place the Chia pet on the plastic tray provided because it will leak water.  It also helps to mist your Chia pet with a spray bottle.
As you can see, I had much better results on my second try.


Chia seeds are considered a super food.  They can be consumed as seeds or after the seeds sprout.  This article provides information about the benefits of including Chia seeds in your diet.  Sorry Sprout....I will be eating your sprouts.

This is Sprout without his lush green coat!
 Keep the harvested sprouts in the refrigerator.

I added some Chia sprouts to my Avocado Sandwich.
Check this lady's blog for recipes and more ideas.

Jabberbug

Sunday, March 13, 2011

Breakfast Couscous

I love to eat Couscous because of its nutritional value but also because it is so easy and quick to prepare.  Most people think Couscous is a grain but it really is considered a Pasta.  Up to know I've used Couscous in savory dishes and I was pleasantly surprised how good it was cooked in orange juice.  I found the recipe I used this morning in the book The New Glucose Revolution Low GI Family Cookbook.


I did not have the exact ingredients but went ahead with what I had and it turned delicious.

This is my interpretation:
Breakfast Couscous
1/2 cup Orange Juice
1/3  cup water
1/4 tsp cinnamon
1/2 cup Tri Color Couscous
2 tbsp dried chopped apricots
Plain greek yogurt 
1 tsp Agave sweetener
2 tbsp toasted unsweetened coconut
1 tbsp whole wheat germ

1. Combine the orange juice, water and cinnamon in a small saucepan and bring to a simmer.
2. Add the chopped dried apricots to the juice.
3. Once the orange juice begins to simmer, add the couscous and turn off the heat.  Cover and allow the Couscous to absorb the liquids.  Fluff with a fork.
4. Sweeten the Greek yogurt using the Agave sweetener
5. Serve the warm couscous with Sweetened Greek Yogurt and top with the toasted coconut.

If you do not have any coconut you can add: slivered almonds or Wheat Germ.

Delicious and quick!


Jabberbug

Tuesday, March 08, 2011

Whole Wheat Israeli Couscous

January2011 009
I really like Zahas Whole Wheat Israeli Couscous. It is nothing like the Bulgur couscous used to make Tabbouleh. I like to keep it in my pantry because it's very quick and easy  to prepare.    It is sold in small 8.8 oz packages and  the instructions only tell you how to cook the whole package.  I usually cook enough for one serving using 1/2 cup of the couscous with approximately 3/4 cup of water.

The instructions tell you to cook it in 2 tablespoons of oil (I use olive oil or grapeseed oil).  Basically you will be browning it and then you add boiling water.  It will be ready in 6 minutes.  The cooked couscous will be crunchy.


January2011 010

After I cook the couscous I usually sautee onions, mushrooms, peppers or tomatoes.  Any of your favorite veggies will do.  I added spinach to this recipe.


January2011 011

The yellow peppers and sugar plum tomatoes from Trader Joes were delicious in this recipe.
Whole Wheat Israeli Couscous

This delicious alternative to pasta supplies 6 grams of protein per 1/3 cup and it only contains 1 gram of sugar.

Saturday, March 05, 2011

Origami Newspaper Pots

The weather is changing rapidly and has been consistently mild causing all kinds of beautiful blooms.  I do hope this continues and we don't get any freezing temperatures.  It still could happen, time will tell.  We have gotten snow in Charlotte in April.  So I thought I would get a head start and plant seeds indoors hence the Origami Paper Pots.  All you need is newspaper and a desire to fold....trust me it is therapeutic.  It does take time but you will be so proud you did not just recycle your newspaper but repurposed it.  I used a small newspaper.  If you use the large size you will get two squares from each sheet. After cutting the paper, you will need to square the sheet.  Just fold in a diagonal to cut into the square shape.  The piece should measure a little over 10 inches square.
 Fold paper diagonally on both directions to mark the center.  Fold each corner so the points meet the center.
 Fold each corner once again in the same way.
Fold up and divide into thirds. (Eyeball the folds) If you want you can use a ruler to make sure the measurements are about the same. Do this folding in both directions.
Once folded into thirds your square should look like this.  Don't forget to repeat the process in the other direction.

After folding in this manner in both direction notice you have a grid. The base of the pot will be approximately 2 to 2-1/2 inches.
This is the tricky part but don't give up.  You will be folding up the sides to create a box.
This is how it should look once you fold up.  Now bring the top and fold it down so it is now inside the box.
After you fold down the side tuck the point inside the box.
The finished box should measure approximately 2 to 2-/12 inches square.  


Fill the paper pots with loose soil and place in a pan.  I used a rectangular cake pan.


Place around 3 to 4 seeds and cover with about 1 teaspoon of soil. Water and keep moist.  I made a  tent using the plastic wrap in which rolls of paper towel came.  Keep the wrapping loose to simulate a  greenhouse.


I planted Cornflower seeds and they sprung fast.  This is how the seeds looked two days  after planting.


A week later the seedlings look happy although thin.  Keep in a well lit location and water using a spray bottle.  I squirt them when I see the top of the soil looks dry.  You will do this at least 4 times a week.
I will be planting these outside soon.  There is no need to take them out of the paper pots.  Plant them directly into the ground.  The paper will disintegrate.

Jabberbug